
Today is my good friends' (yes, plural. Twins and the one's fiance all have the same birthday- Epic). They decided to head out on the town to a Masquerade party this coming weekend. Of course, me being me, I can't just buy a mask because 1. that's not being thrifty and 2. someone else is bound to have the same one. So I bring you my own DIY Masquerade Mask complete with pictures. :)
 |

Gather your supplies!

Michaels: Mask, Black Glitter, Purple/Black Feathers
Dollarama: Black Paint, Brushes, Glitter Glue, Ribbon
Walmart: Gemstones
Home: Hot Glue Gun, Mod Podge, Small Brushes, Tweezers, Glitter, Newspaper

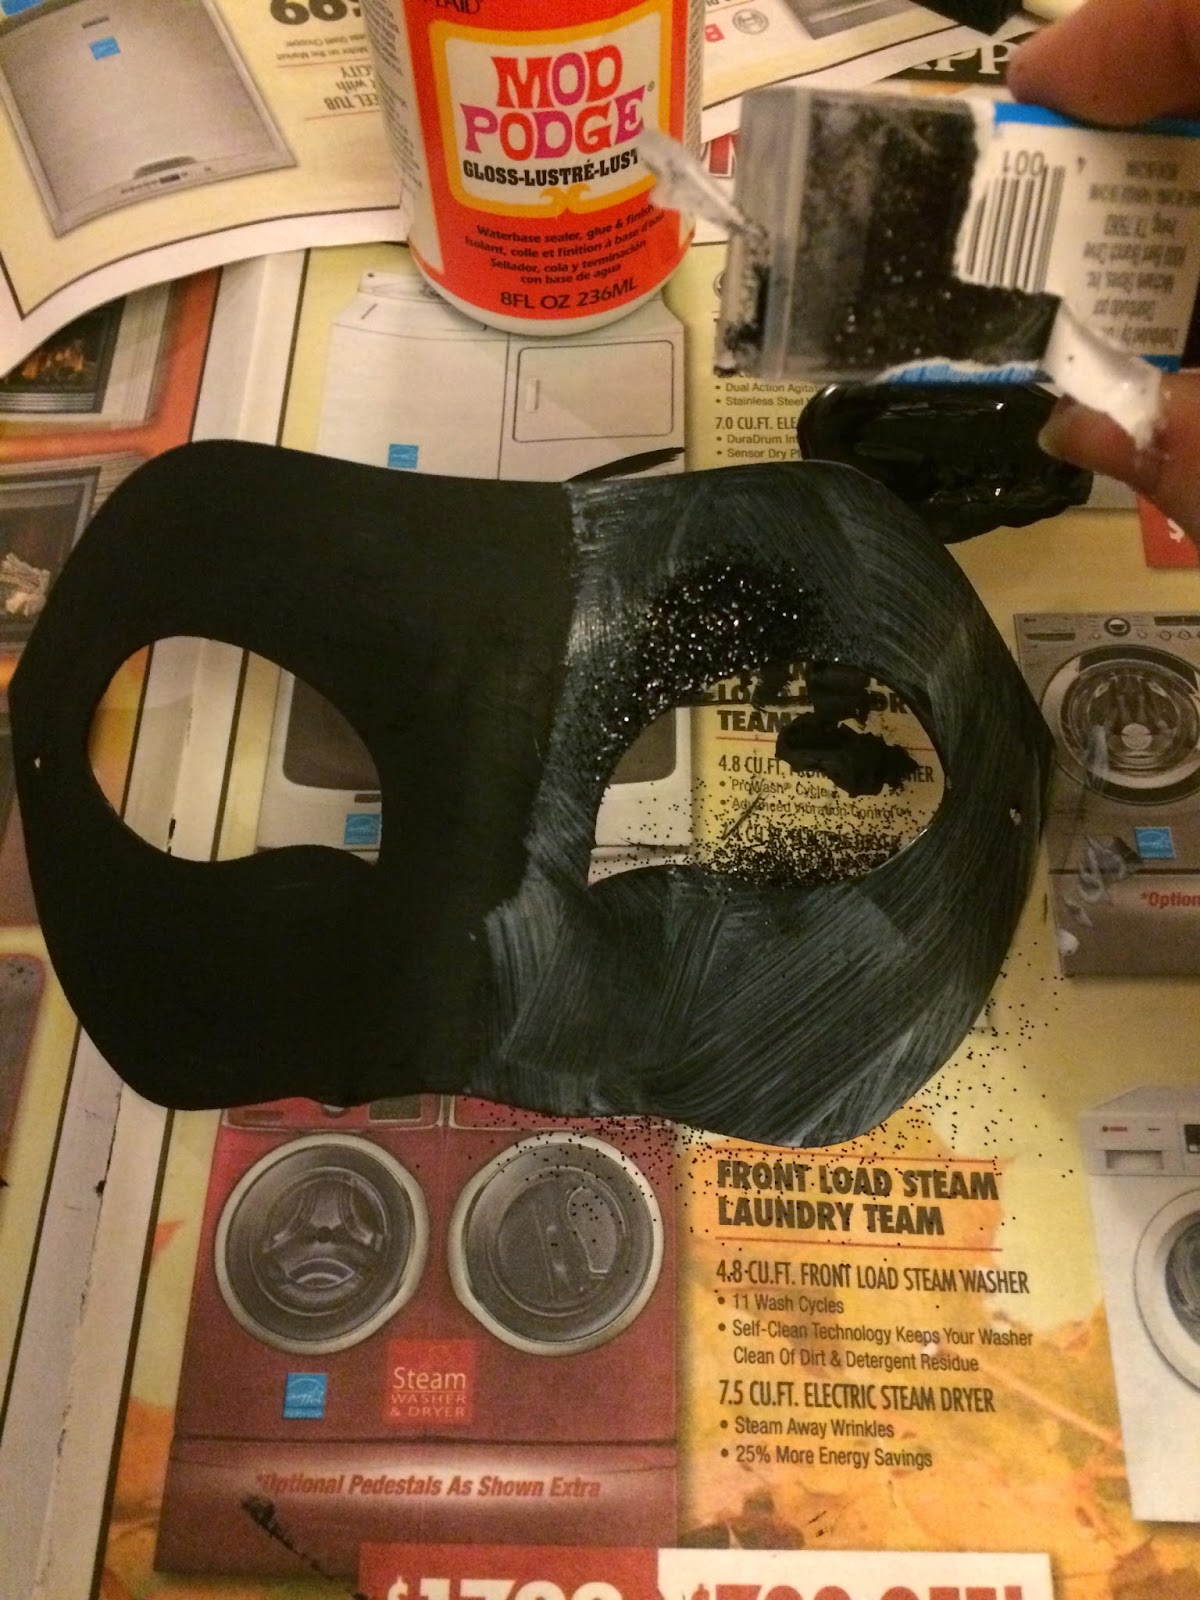
Lay out some newspaper so you don't glitter bomb your surface or paint it! Now paint your mask black! Make sure you get all the edges and inside the eyes. You don't want to see any white poking through, but don't worry about the back. Use a thin coat so this dries faster.


Once the paint dries (about 5 minutes later) add a thin layer of mod podge to one side of the mask.


Add your glitter to the mod podge. Make sure to cover the entire area the best you can. Shake off the excess and repeat. I chose black glitter so that it enhances the black, but still makes it girly. You can do any colour you wish.

Repeat step three and four to the other side of the mask. Then let the mod podge dry for about 5 minutes. While you wait, heat up your glue gun and look through your feathers. Some might come bent or they may not be the shape you want.


I almost forgot to do this crucial step and let me tell you, it would have really sucked if I did. Add your ribbon so you can wear your mask now. Insert the ribbon through the hole and tie it into a knot around the back. Repeat on the other side. You will have one string on either side now.


Start adding your feathers where you want them. I held them on the mask where I wanted them BEFORE I glued them down. It really sucks to pull them off if misplaced and makes it super messy. Yes, I had to pull one off :(! You want to apply them in layers to cover any of the stems and to make it look full.


I wanted to add some depth to the purple, so I chose to add some black feathers. Make sure to wrap the feathers into the eye hole so that you can still see. I glued and trimmed some of them. I also trimmed some by the nose as breathing in feathers is not a nice feeling (sneeeeeze fest).


Time to add some rhinestones :) I chose to outline the other eye with my rhinestones creating a cat like line. To do this, just follow the eye cut-out and extend each corner with a few extra stones. I also changed the size of the stone near the outside of the eye. I used tweezers to hold the rhinestone and put the glue on the back. If they get stuck to the tweezers, use a toothpick to help push them down onto the mask.


Once the eye is complete, I added glitter glue to only the black feathers. I later added some silver glitter that I had on hand to make them stand out more. Apply both of these with a smaller paintbrush. Use a small amount and go slow. You don't want it to look like Ke$ha threw up on your mask.


 |
| My Masquerade Mask |
 |
| My Friend's Masquerade Mask |
If you complete this DIY- show me your pictures below. :)

Wow! What a great job you guys did with those masks!
ReplyDeleteI don't have a masquerade ball to go to but I sure want to make one of these.
Great post :)
Jay xx
jayxoxox18.blogspot.com
Thanks Jay!! You could always make one for decoration or host your own masquerade mask themed party :)
Delete- D xo
This is amazing! And so creative and fun, which immediately makes me want to make one haha :) Such a lovely and inspiring post, thank you! <3
ReplyDeleteJemma xx
www.dorkface.co.uk
You are welcome! If you ever end up making one I want to see it!
Deletegood luck!
- D xo
Such a cool DIY ! I love masquerade masks !
ReplyDeleteFeathers and Brushes | Swiss | Beauty & Lifestyle
Thank you <3
Delete- D xo
that's so pretty and very creative! i love it!
ReplyDeletewww.bumascloset.com
Thank you so much! turned out much better than expected! :)
Delete- D xo